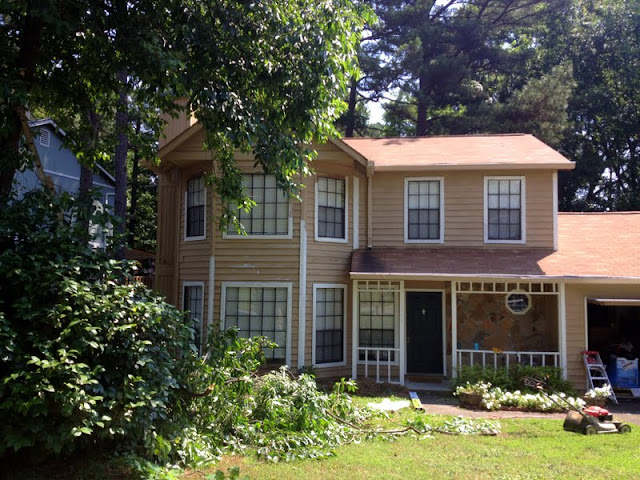
Ok, just so we’re clear on what I mean by “tree trimming” this close to the holidays, I’m actually talking about this hot mess:
An alternative title for this post could easily be called “How to cut down significant portions of tree and not kill yourself (or the tree) in the process.”
As I mentioned in the post about the wacky squirrel shenanigans I’ve had to deal with lately, I noticed that one of my trees in the front yard had branches that were a little too close to the house for comfort. And even though I’ve done the whole tree maintenance thing a few times over the last several years while owning this house (and once hired pros to take on the bigger stuff), I realized that I’ve also never really covered much in terms of how the DIY process typically goes when trying to get rid of excess tree limbs. So, here are a few tips that you might find useful whenever you think about tackling trees yourself.
First: Why bother?
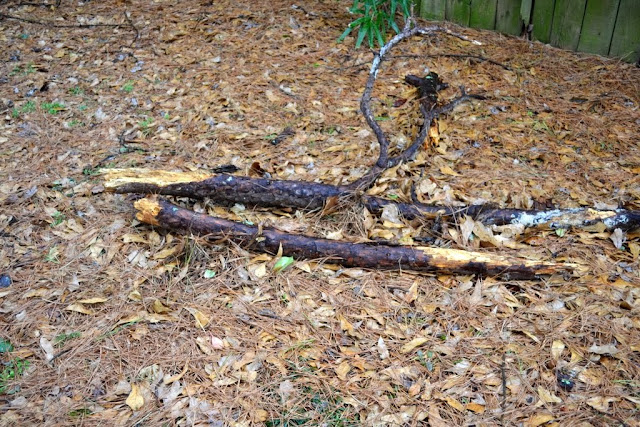
Other than things like a tree’s limbs getting too close to your home (or over the roof), there are a number of other reasons to prune a tree. For one, dead or dying limbs are a hazard; there’s a reason that dangling branches are called “widowmakers”! They may look like a stick from way down on the ground, but they are very (as in loss-of-consciousness-or-even-death) heavy. A direct connection with one of these could cause your window to break, or, you know… a broken skull.
Keeping dead limbs away from healthy growth also keeps bugs, rot, and disease from infecting the rest of the tree or other plants… which could potentially turn a simple dead limb into a large, dead tree that could fall onto the house in very little time. Thinning a dense canopy of branches also allows sunlight to hit the ground and increases air flow, which also results in less disease. Not to mention, a freshly trimmed tree often makes whole yard just look more aesthetically pleasing and less like a haunted house (hint hint, neighbor down the street).
For the most part, this is very much DIY-able.
I get that climbing a ladder, working with a chainsaw-on-a-pole thing above your head, and relative uneasiness about combining these two things with heights isn’t always easy to keep that lump in your throat from making you chicken out. I even have a little fear of heights myself. But as long as you have someone reliable holding the ladder below you, you use the proper gear (such as safety goggles and rope), and you stay the hell out of the way from a falling branch (or potential one, as the case may be), there’s no reason you can’t take care of plenty of tree maintenance on your own. For larger stuff, such as taking out pine trees or limbing ones that go way over your head, it’s better to call a pro, but the typical scenario I find myself in is just lopping off a few that are closer to the ground. And saws on extension poles actually do go a long way.
How to Avoid Tree Death (Over-pruning)
One of the best tips I received from one of the tree pros is the answer to the question, “How much should you trim from a tree at any given time?” The answer: no more than 15-20%. In my opinion, ten percent is a good rule of thumb for DIY (since it’s easy to get carried away). Then give the tree a few years to recover from its wounds. Over-pruning hurts the trees ability to create food for itself (all of those leaves, if you recall from your elementary science classes, help with photosynthesis) and a healthy tree keeps opportunistic pests at bay.
One thing I’ve recently learned as well is that it’s important to cut the right spot on the branch you’re trimming; cut too close to the trunk, and you create an opportunity for bark issues to infest the trunk; cut too far down the limb, and you create a dead branch that the tree won’t “heal” properly and give you a widowmaker situation to look forward to in the future. (Of course, in awkward situations where I’m really anxious to get down off the ladder, what’s ideal is not always my #1 concern; if the branch is on the ground, I might consider trimming it back further to get it closer to the trunk, or I might leave it and call it a day. It usally depends on whether or not I’m hungry and my arms are tired from holding a heavy pole saw.)
The Right Tools*
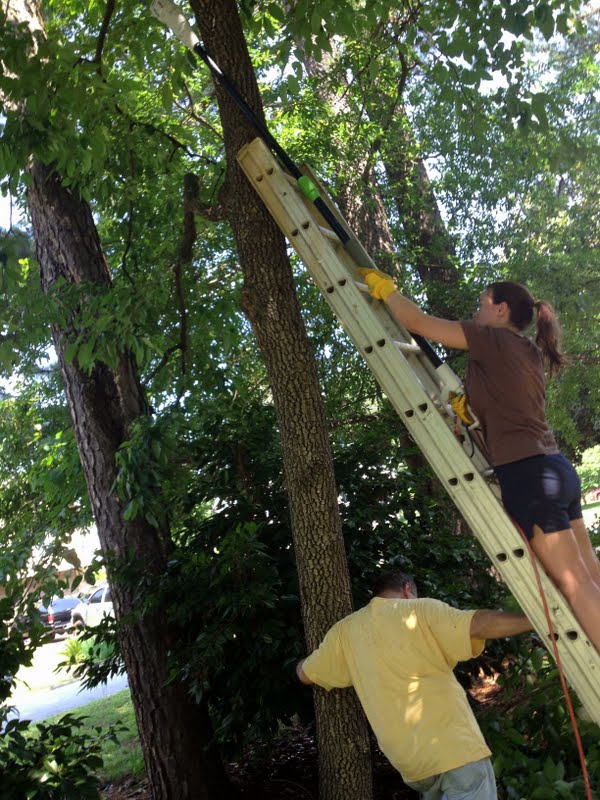
Ladder – Use an A-frame ladder for lower limbs and an extension ladder further up the tree (or one that can be both, like the one linked to). To help stabilize the ladder, definitely use a buddy at the bottom to hold the ladder while you climb. Your buddy can also hand you things like pruners, rope, and pole saws.
Rope – I don’t really mess around when it comes to heights (unlike Charlie). So when I know I’m going to be on a ladder up against a tree, it helps me feel much more comfortable to tie the upper area of the ladder to the tree. It rocks less and reduces slippage.
Pruner/Lopper – You can actually accomplish quite a lot with two-handed pruning shears. They actually make me feel pretty badass at the limited amount of force it takes compared to the pile of clipped branches I can create in just a few minutes.
Telescoping Pole Saw – If you’re going to do this often enough, buy an electric one instead.
Electric Pole Saw – After, oh, the first time I used the manual pole saw, I was quickly converted to the electric version. It’s a lot heavier when you’re holding it in the air like this, but being able to just move the saw in place and let it do the majority of the work is especially nice on thicker limbs.
Safety Tips
I already mentioned the rope part above, but there a few other important things to remember. A lot of these tips are basically the same rule: get the hell out of the way. But you’d be surprised how many times you have to remind yourself of this, so it bears repeating for every scenario this occurs.
Wear safety glasses. Cutting through wood with a chainsaw on a pole will have splinters flying everywhere. Best not to get one in your eye.
Loop the electrical cord. One of the most frustrating things when using something like a saw is the way the electrical cord slips out of place. A good way to keep this from happening is to first pull the cord through the hole in the handle, around the back of the handle and then plug it in.
Don’t ever position the ladder (or yourself) where the branch is likely to fall. You want to have access to the branch, but not be directly under it (again, falling limbs crash down a lot harder than you think they will). Branches usually begin to fall when you’re about halfway through, so they will swing down against the trunk. Gravity alone may be enough to bring them the rest of the way, so you won’t have time to move. Plan accordingly.
Move the ladder. I get it; the branch just above you is super tempting. But don’t do it. Re-position the ladder out of the way, then climb back up and cut.
Position yourself comfortably first, then grab the saw. This is why it’s helpful to have someone below the ladder to both help stabilize it and then hand you the saw. The electrical version is what I prefer, but it’s much heavier, so you get tired faster from holding it in the air (and it’s top-heavy, which makes things even more cumbersome). You can hand it right back down when you’re done, too!
If the pole saw gets stuck in the branch, you might have to back away for a while. It felt kind of dumb to just leave the saw dangling in the air and in the branch, but any amount of wiggling and running it only pinned it further into the tree (and also could have burned out the motor if I kept going). By the time the conversation about what to do next ended, gravity pulled on the branch enough to free the pole saw and it all came crashing down. If this ever happens to you, be careful not to walk under the tree until the branch is down. Even if you try to get a rope around it and pull it down, never do it from under the tree!
Cleanup
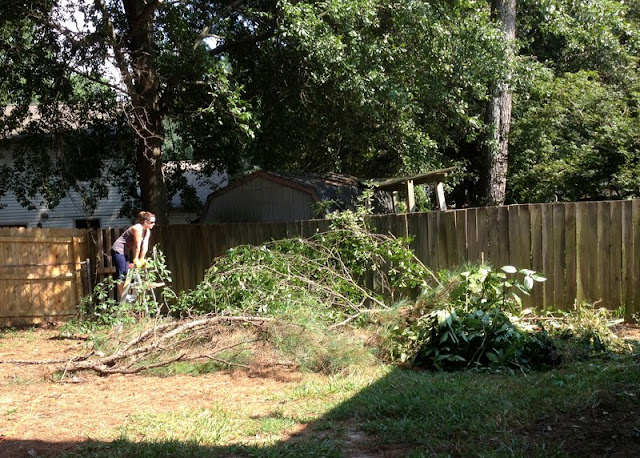
I learned this from observing my professional landscaping neighbor: when you’re taking the limbs out to a truck, clip everything down into manageable pieces. But the magic actually happens in the bed of the truck. Branches won’t lay down on their own usually, but you can often cram a lot more into the bed of the truck by climbing on top (using your body weight to collapse branches) and using your pruning shears to continue clipping at branches that refuse to lay flat. Clip, stomp, clip, stomp, clip, stomp. Even when thinking it’s full, doing this has turned many “this is going to be two trips for sure” into one.
*affiliate links – if you buy these online from these links, it sends me a few pennies for the referral
I’m currently sitting at my computer with painful shin splits, which means that the steps I need to get down and out of the house and I are not on speaking terms right now… not that I usually talk to my stairs, but… meh… my legs hurt and I don’t feel like coming up with a more clever way to describe that right now. I’m sorry.
All I need is a little R&R, but the softball doubleheader that caused the aforementioned injury has me walking in a way where I feel old and look constipated, so I’m generally acting a little more Danny Glover than usual.
And even though it also feels like my to-do list is longer this month than last, I still have some new (albeit far more boring than squirrel fights) house progress to report. So let’s start with the exterior! Overuse of exclamation points to make it seem exciting!
First: new shrubs! Last year, I took out some of the older shrubs near the front windows that I thought were too far gone to really “work” anymore. They were a different variety than the holly nearby, and the growing patterns between the two types often resulted in big, empty bald patches when I sporadically neglectfully got around to trimming each hedge. So to keep things equally shiny and green across the board, the new shrubs will more closely match the existing ones and will hopefully fill in nicely over time. Mulching, on the other hand… haven’t really convinced myself to do that yet. Even though there are far fewer trees in the yard, pine straw will begin wafting over from other neighbors soon enough, so I’ll probably address it then.
Second: other new shrubs! As part of the huge clearance-inspired planting from September, I also bought another one of the lovely-colored shrubs that have grown so nicely and (more importantly) low-maintenance in the garden bed since moving in. It’s now planted in the bare spot on the left side of the front porch where there should be more visual balance to the three on the right, along with some purple phlox (that nearly died but is quickly bouncing back and hopefully getting established before cold temps settle in). The shrub, which I forget the name of again (it’s hell getting old… or just feeling old, as we’ve established), grows fast and changes color (bright green, green with red tips, pale green with white flowers, etc.).
So basically, everything should all look more cohesive in the spring.
Third: Fewer tree limbs! I mentioned in last week’s post that a tree in my front yard had branches too close to the roof (for reasons that I won’t dwell on because it requires thinking about a certain bitchy rodent). I trimmed the closest ones since then (and will have a DIY tutorial to share on it), and all is right with the whole tree-to-roof (or lack thereof) situation.
Fourth: Lawn guy! I think I may have found a local guy to maintain the yard and won’t cost me a fortune. He’s knowledgeable and does all the parts that are a huge pain (such as all of it), so I may have finally reached a break even point between my willingness to do the labor and my uncompromising frugality. Crossing my fingers on this one, but so far so good. One less thing on my plate and my yard looks snappier and trimmed up for pictures. Win-win.
Finally: Trim painting! while I haven’t done a lot of it yet, the amount I have tackled in the last few days is already making the chimney and view from the curb more complete. I’ve got the extended ladder propped up outside, so as soon as these shins start working properly again, more portions will be done.
Not bad for a busy week, but there’s still more to come very soon: the basics of how to trim tall trees (what you need to know), and the first peek at all the new paint and molding in the kitchen!
Spoiler alert: This post is QUITE long — as in, grab-yourself-some-coffee-and-settle-in, long. There are also an unusual number of movie references in this post. It just sort of happened. Also, taking pictures in a dark, hot attic isn’t that convenient to do, so my apologies ahead of time for some of the lousy flash photography (or just plain missing photography) throughout. I think the story is funny though, so I hope it’s worth the read!
This, my friends, is how I got rid of attic squirrels.
It all started with scratching. For those who haven’t yet experienced the sound of animals invading your attic, let me assure you: you’re not going to be confused about what’s happening. The scratching will be loud, it will be at inconvenient times of day, and you will hear them scampering across your ceiling. Luckily for me, the squirrel who decided to take up residence at the UDH did so directly over my master bedroom, so I couldn’t not hear it the minute the bushy-tailed rat found its way in. Asshole score: 3.
Also, let me assure you of another fact: squirrels are assholes. Throughout this experience, my patience grew thin enough to peel the sanity back a little from my brain. I wanted to avoid killing the squirrel (or as I found out, squirrels, plural) as much as I could because I’m not a monster, but I also didn’t want to have to spend hundreds of dollars on hiring a professional to trap it. Factor in a growling, curious dog who isn’t keen on hearing animals in the home, and you’ve got a recipe for one insanely annoyed homeowner in record time.
The Emporer’s New Groove has already figured out this principle.
Round 1
I was sitting in bed one night when I heard the telltale signs of something moving around in my attic. There was a gnawing sound, a scampering sound, and rustling. Clearly, something had made a hole and was deciding to move into my attic. A few days later, I spotted the culprit simply hanging out of the louvered gable vent. Like it was on vacation. It looked right at me, and I could have sworn I saw a smug smile on its dumb little face. Asshole score: 4.
I quickly consulted my dad about the situation, who brought over a trap on his next visit and taught me how to set it. The general plan was:
Trap the bushy-tailed bastard
Short of that, wait for it to leave the attic for food (which happens daily) and close off its access point
Make sure any and all potential access points were sealed with thick-gauged metal mesh
We hypothesized a few spots for the trap, but as each day continued with more gnawing and scratching directly above my head as I was sleeping, I’ll admit that I felt a sense of urgency to get it out ASAP. So, I went up to my attic to investigate. I also went out and purchased some metal hardware cloth (you can find this in the landscape area in most home improvement stores) and a handheld staple gun with a front-facing trigger (most have the part you squeeze on the opposite end of where the staple comes out; this one seemed to offer better control in a tight space by letting be push down directly over the staple area). I have an electric-powered stapler already, but I figured something cordless would be a lot more convenient in an attic space for this project.
With a few snips from a jewelry cutter and wire stripper multi-tool (I don’t actually have tin snips, so I got a little creative), I had a rectangular piece of mesh that I could easily transport. I hadn’t yet seen what size I might need to cover the opening around the vent, but I figured an oversized pre-cut piece could still work and be a lot easier to handle than dragging up the entire roll and trying to cut in place (plus, if I needed a new piece, I had plenty of material to try again).
With the stapler and mesh in hand, I crawled up into my attic and began looking around. Other than switching out air filters, most of my previous attic projects had all been done on various other ends of the house, with plenty of free access to get to the area in question. This, as it turns out, was different. Over my master bedroom, there’s a gabled dormer area, which up until this project, I hadn’t really noticed was harder to access than the rest. Flashlight in hand, I realized that this wasn’t going to be a quick in-and-out thing.
Good luck with that.
Yeah… I know what you’re thinking. That little area looks like it’s made entirely of nope, with maybe a little bit of fear and stale air thrown in for good measure. It is, and I’m just hypothesizing here, probably the place that the horrifying ghost kids from The Grudge sleep in between terrifying Sarah Michelle Gellar and playing bedsheet peek-a-boo. And this is where the family of squirrels decided to squat, rent-free. Asshole score: 7.
I waited until a point of the day where I thought I heard the squirrel leave, then crawled up and took a look around. Not only would I need to crawl through that, but I’d also have to make sure I only placed my body weight on the attic joists to prevent from falling through the ceiling drywall below (which as Chevy Chase has shown us at the 33-second mark, doesn’t work out so well).
I tried in vain to find another, bigger access point, but it was of no use. So, I had to creep over to this spot, compact myself down, straddling the attic joists with my knees (ouch) until I could curl my back Hindu pushup-style under the upper section of plywood and through the hole. Kind of like Catherine Zeta-Jones in Entrapment, but with a lot less spandex and grace. Thank God for yoga. And baseball caps to protect my head from freaking out over spider webs brushing into my hair (shudder).
During this first little exercise, I climbed up there with full intentions of inspecting the area, stapling on the metal screen, and calling it a day. The hardware cloth had already been cut, the staple gun was ready, and all of my plans were going to work out perfectly, right? I spotted the nest that the squirrel had been making and inspected it from a few feet away, careful not to just lumber over in case something was inside of it.
Something was. Even though the mama squirrel was out for the afternoon, I could clearly see, at a minimum, there was at least one baby sleeping in the nest. Damn. This confirmed that I wasn’t just dealing with a single squirrel and getting it out before it had babies. Defeated for the day (because climbing up there twice was not happening), I slid back through the opening and climbed back down from the attic.
Round 2
I tried a few more times to capture the mama squirrel with the trap, but each time, it found a way to take the food and leave the trap unaffected in any other way. And even if I had caught the mama, how was I going to subsequently catch the baby (or however many there were)? I was getting frustrated. Maybe an odor of some kind would make them leave? I’d read mixed reviews of “squirrel repellent” sprays online, which were basically a mix of peppery spices and rancid odors that squirrels are rumored to hate. I say “rumored” because some people think these sprays don’t work worth a damn, but I was willing to try it if it meant a non-lethal way to get them out. I found a bottle of spray at my nearest home store on clearance and put it up in the attic for the next episode.
SOON.
A couple of days later, I waited to hear the mama leave again and climbed back up. This shit was getting old. I grabbed my supplies again along with a small plastic bowl of a few ammonia-soaked t-shirt rags. I had been doing some online research about what odors get them out, and this was one of the suggestions, so I figured I’d try it (note: the smell of pure ammonia is not something you want to breathe in, so be very cautious when handling it! I kept the rags in a plastic container until I distributed them in the area.). I crawled through the narrow opening again, and instead of finding the attic empty, I quickly spotted the babies hanging out in one corner. They were awake this time, cowering away from me as I made my presence known. To my surprise, they weren’t in that hairless newborn stage; instead, they looked like they were many weeks old already, nearly fully-grown juveniles. Perhaps the mama had her babies elsewhere and began looking for a safer nest when she found my attic?
I took this as good news; I’d been reading online how difficult it would be to get a mama to leave her nest right when the babies were born, but at later stages as the babies (called “kittens”) got old enough to be on their own, it would be easier to give them the boot. As these thoughts were coming into my head, I heard more scratching in a different corner. I turned my flashlight back toward the opening of the vent to find a much larger version staring menacingly at me. The mama squirrel had been there the whole time!
via quickmeme.com
She made a few quick, darting movements toward her babies, careful to look as rage-y and dangerous as possible in front of her unknown invader. I know squirrels are much smaller than me, but in this situation? I was certainly not willing to stick around. Asshole score: 4.
I quickly sprayed the area with the squirrel repellent spray in front of me and tossed around the rags. In my awkward, cramped position, I knew that if it came anywhere near me, I wasn’t going to be able to retreat fast enough and might very well get my ass handed to me by a rodent trying to protect her babies. I pounded the bottom of the heavy spray bottle against one of the attic joists to sound big and loud as I climbed back out (I read they have pretty good eyesight, so I’m pretty sure the same tactics you use with a bear in the woods is probably the wrong call for a squirrel, but I was willing to do whatever it took to keep that squirrel frozen in fear). Then, of course, I waited.
The next day, I climbed up and checked again (the ammonia smell dissipates quickly, so it’s important to act ASAP). No mama! No babies! I could finally close off the hole in the gable vent! With lots of stables to hold the hardware cloth in place, I knew that I’d have some exterior repair to address, but at least there was no way anything was going to get in or out of this hole anytime soon.
Round 3
Did you catch that? In or out? Yeah. The very next day, I heard familiar sounds of the mama trying to leave the attic. What I thought had been a successful eviction was a simple change of address. The mama made a new nest — in my chimney!
I also heard her discovery of the new mesh screen, and for sure, that mesh was not budging. Yaaaaaayyyy…. eh. Well, at least I knew it worked? This time, she picked the very corner of the dormer (where there was a small peek of light shining through) and worked at it until she escaped. I was going to have to try again, and now needed to take care of two areas: one, the new nest (which was not in the dormer area and easier to reach); and two, close off the new hole once I got them out. But how? I went back to the online forums and found one last non-lethal suggestion that people insisted they had good results from: bug bombs.
As it turns out, occasionally setting off one of these foggers in the attic (as part of home maintenance) had a few perks. It takes care of a large variety of pests, makes it uncomfortable for creatures like squirrels (it’s not a recommended use for them, but I have a habit of using things despite their intended purpose), and to my surprise, evicts the pests that creatures tend to bring in, like fleas. Apparently, squirrels have a bad habit of infesting their surrounding nest areas with fleas, and even though Charlie gets treated every month to keep them away, eliminating a waiting infestation sounded like a win-win to me.
I picked out this one since it seemed the least likely to blow my house up in the process (I didn’t have to turn off my pilot lights or worry about the gas). I also sealed off the air conditioning vents and turned off the A/C before setting up the canister, closing off the attic area as much as possible. Charlie and I went to hang out with my parents for the day, and I came home to a quiet house. I chose to wait a couple of days to see if there were any new sounds coming from above before climbing back up and sealing off the remaining hole.
I briefly considered that the bug bomb might kill the squirrels rather than cause them to leave, which left me with a few days of worrying about a dead squirrel scavenger hunt in the attic (I definitely didn’t want them dying somewhere inside my drywall and dealing with that problem). A few days later, relief: I heard the mama squirrel once more. Only this time, she was trying to find a new way in the attic rather than out!
Hooray, it worked!! I assumed that once I got them out, that would kind of be the end of it. A little repair work, but no more stressing out. But nooooooope.
Round 4
I had no idea what squirrels sounded like when they’re telling you to eff the eff off. Apparently, it sounds like this:
Now that the squirrel was out of the attic, she was trying to find a way back in, baby in tow (not sure if she had it clutched in her mouth or simply clinging to her). I was pretty annoyed once more, seeing as how she was now picking yet another place along my roof line to destroy (which I’m reminded, I just paid to have repaired), so I chucked a few pine cones in her direction to get her to leave it alone. She then repeated this several more times over the next few hours that morning, each time driving Charlie over the edge (and me with it). She also took turns to sit on my roof and angrily chirp at me, clearly very annoyed at my nerve to boot her from my house.
Asshole score: motherf*cking 11.
Round 5
At this point, I was done. The next day and two more days after that, it was the same thing. Sometimes she came with one of the babies, and sometimes she didn’t. I think there was a sense of urgency because there was a new hawk predator thing flying around, but the result was the same. Scratching… damage… pine cones… loud chirps… standoff and retreat. One final day, I think we’d both decided we’d had enough. It was going to be the LAST day. She started the morning out with the usual gnawing and noise, but in between her attempts, decided to drop her baby (for safekeeping?) down to hang out at the very base of my chimney.
Seeing my opportunity, I went back into the house and grabbed a shoebox. I then scoooped up the baby using the lid to encourage it in, covered the box with the lid, and marched the box into the back yard, away from the house.
Yep. I committed a squirrel-napping. Sure enough, the mama followed me allllll the way out to the yard as I went, carefully observing where I left the shoebox as I went back into the house once more. I wasn’t planning on leaving it in the box, but I did want to distract the mama long enough to put some mesh at the new spot it was working on. When finished, I went back out to the shoebox, dumped its contents over the fence, and watched the mama chase off after it.
Round 6
She returned later in the afternoon, but each time, I was outside working on the garden. For a brief period, she jumped from the roof to the tree in the front yard and back again (the overhanging branches made that a little too easy, so I made a mental note to take care of it soon). She was clearly frustrated at my presence as much as I was frustrated at hers. The more she chirped, the more I stared her down (like I said: this whole thing definitely peeled back the sanity a little).
Giving zero f*cks at this point.
Then, it looked a few short hops down the tree, looked at me again, and chirped. And then did it twice more, coming further down to the base of the tree each time… ultimately stopping at the bottom, just a few feet from me. As it made its way down, I noticed that along its backside, near the tail, it has a small, craggy scar where a patch of fur didn’t grow back.
My immediate thought: Oh, crap… am I about to have to fight off a prison squirrel?
Of course, when you’re in this situation, backing down would make me immediately lose this battle. I simply knew that it meant the same pattern of hearing it trying to find a way in the attic again, doing a small amount of damage, chasing it off, and repeat. But I was done. I wanted this over with.
My response? I looked straight at the bushy-tailed rat, threw my arms up, and in all seriousness, shouted: “You wanna GO? Let’s GO.“
via giphy.com
There I am, standing on my front lawn, getting ready to throw down with a squirrel that has obviously seen some shit. To any possible neighbors, who curiously weren’t outside watching at this point, I am pretty sure I looked like a total psychopath arguing with a tree (the squirrel would not have been visible from their vantage point, so I’m sure I would have looked even crazier arguing with air).
I started briefly thinking about what I might do if the squirrel did, in fact, lunge at me. I had nothing in my hands, but I didn’t want to break eye contact to look around for a stick. I was in a staring contest with a damn squirrel, for God’s sake. Sanity had gone out the window. And I wasn’t about to lose.
Then, just as quickly as it all happened, the squirrel apparently decided that I looked a lot bigger than I did when it was up in the tree. It ran back up, jumped from the tree limb to the roof line, and scampered off (chirping something along the lines of “You’re not worth it!”, I’m sure).
And that was that. Dad brought over his pole saw about a week later. Together, we removed some of the closer branches that came closer to the roof, thus eliminating some of its ease of getting to the attic area from the front yard. I still have to repair the cosmetic damage on the exterior, but the mesh will prevent anything from using those spots again anytime soon. The squirrel and its babies have not returned, thus paving the way for the return of the woodpeckers trying out their own brand of annoying on the house.
Ok, so I intended on the next thing I published to be a post about my recent wackadoo experience with a territorial squirrel in my attic, but it turns out that recapping a weeks-long battle with fluffy rats is a lot longer of a story than I thought.
It’s coming… I just need a break from writing it to share this:
Not sure how my cabinets look this off-kilter from a simple mobile snap, but there it is.
YOU GUYS. MY KITCHEN. IS ALMOST DONE.
I’ve been working on it for a really long time, but as we all know, I’ve had to remove wallpaper and skim coat a lot of walls in this house. And after somanyrooms needing the same treatment, I’ve just plain lost some of that mojo and repeatedly picked up the project only to put it on hold again (of which, I’m a gold medal-winning procrastinator).* I’ve also had to revert to hand sanding the upper wall area since the one drawback from my super awesome wall sanding kit is that it doesn’t like tight spaces so much. Go figure.
Anyway, this means that as of tonight, I’m painting my pantry wall. I’ve finished the joint compound steps (on all but one wall)! And the sanding steps! And the primer! I might be able to paint more than just my pantry wall depending on how far the paint sample stretches (I’m guessing not much further, but I learned a long time ago not to buy a gallon without trying a tester first. Unless you feel like ignoring that advice and just going for it. Or you’re pressed for time. Or a million other reasons, but the point is I’m saying you should test out the color first if you don’t like wasting money on gallons of bad paint).
It’s currently 11ish PM, and I’m still planning on painting this evening. I’m sure that’s weird for most people, but after putting this off for so long, making progress like this is better than warm milk. More soon!
*Not actually a thing. But if it were, I would win gold.