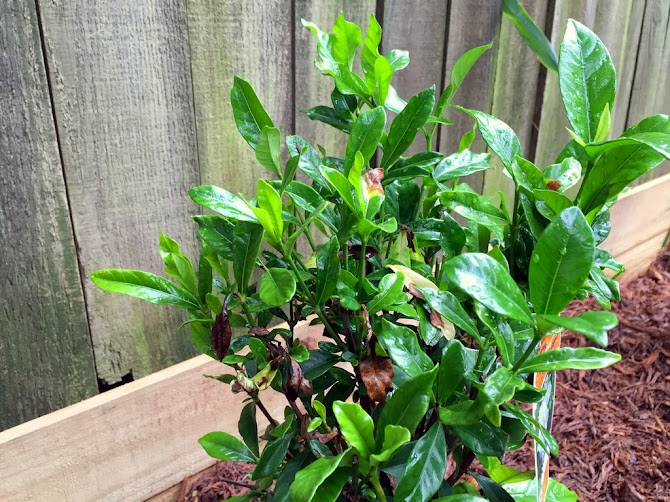
My hydrangeas are back, and they’re basically the prettiest things I own. Even prettier than Charlie, but that’s because she jumped my fence this morning and I’m mad at her, so she looks like trouble to me instead (kind of like when she climbed on my roof).
All of the pine straw seems to be working its magic on making all of them bluer than last year’s blooms (which I still loved), but I couldn’t be happier. Green ones are my favorite color of hydrangea, but I haven’t tried planting any of those yet. The blue ones still kick ass, though:
Also, little known fact: if you post a picture of blue hydrangeas, purple hydrangeas, or pink hydrangeas on Instagram, people will immediately tell you how to make them not that color. Add sulfur! Add egg shells! Add coffee grounds! Add your toenail clippings! Ok, that last one was fake and also gross, but you get the point. It’s kind of like everyone telling you why you’re so sleepy on Thanksgiving, but instead of there being one reason you’re in a food coma, there are six different ways to get there.
I think at this point, I am 110% covered on how to bring out a certain color on hydrangeas, but what I haven’t tried yet is propagating them. I intend to do that next (because who wouldn’t want even more pictures to share of more hydrangeas and get even more advice about how to make them blue?), so I’m still taking advice on that front. Especially after my history of killing anything that grows from a seedling.
There are other flowers blooming all over my yard, so there is a lot of color going on everywhere.
Ahem… not a lot of weeding going on, though.
But, for this weekend, I think I’ll just stare a little longer at these beauties and remind myself what past work on this backyard as blossomed into; maybe that will get me to finish the beds faster!
P.S. I meant to have the floating shelves play-by-play in the laundry room ready this week, but they wound up needing another coat before I could be done… and I suck at Google Sketchup. So, next week it is.
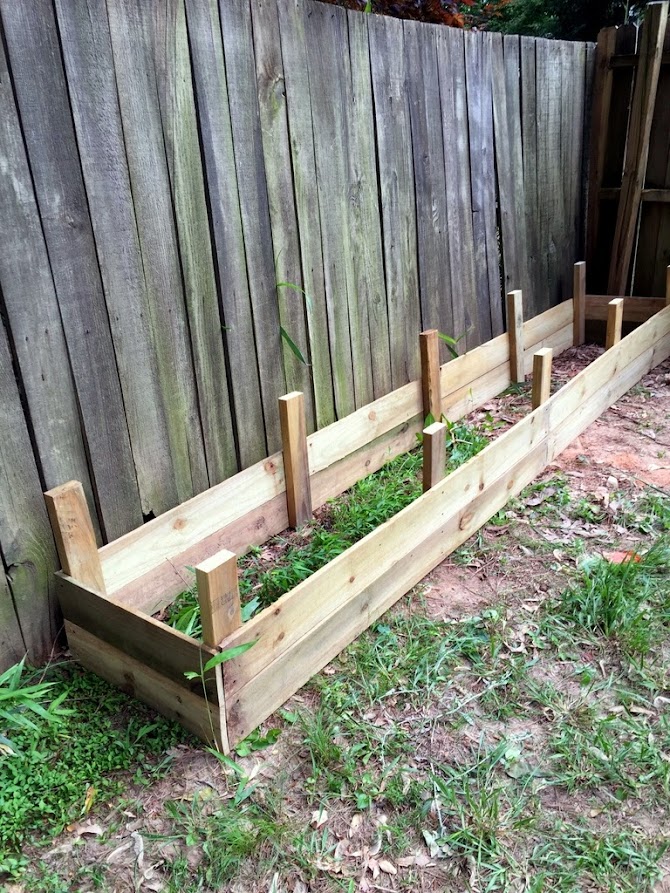
I hope those of you in the states had a happy, safe, and productive holiday weekend! I spent part of mine working on my garden beds:
The good news: all of the garden beds are now buried in their rightful spots in the dirt (sweet!). These three long garden beds were basically FREE thanks to some leftover materials I had from building this part of my fence (which was also basically free since my sister had these items left over from her fencing project, so it was win-win-win). I originally started with these plans, but modified them to be a little narrower and longer for each bed since I’m not planning on planting edibles in them (there’s not enough sunlight on this side of the yard). Let me know if you want the exact plans & I’ll include a post this week with them.
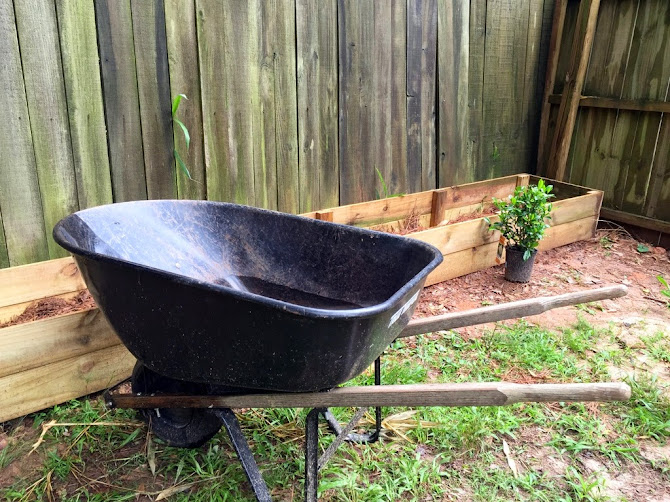
The bad news — er, well, the less fun news: I have a lot of layering to do. It means a lot of trips back and forth with the wheelbarrow, but thankfully I found this amazing Youtube video that has taught me how to pop my upper back by myself, which is such a help.
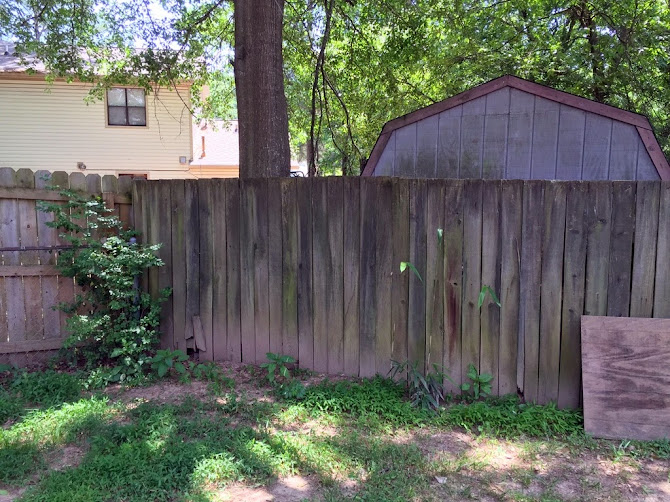
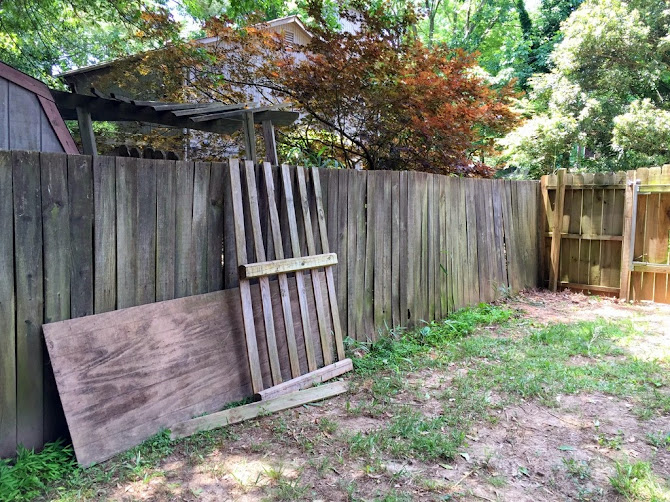
If you want to see what I started with, I took a few extra pictures before installing them. It’s pretty clear from these pictures why I’m putting these in front of this neighboring fence (word to the wise: do NOT plant bamboo in your yard… it grows fast and destroys everything around it!). While I can’t do much to repair it (I’d rather not incur the expense of repairing someone else’s fence to this extent, and the bamboo on the other side will still cause problems), I can certainly dress up this side and hide it a little with some evergreen shrubs — and the raised beds prevent me from having to dig down into the hard Georgia dirt and remove roots.
Sidenote: isn’t that Japanese maple in their yard gorgeous? I’m thinking of planting one along a back corner of my own yard (neighbors on both sides have them, actually).
I’m using a method that is sometimes called “lasagna gardening”; essentially, I’m putting in various layers of things like cardboard, mulch, yard clippings, and soil. A little gardening research told me that this will give my aforementioned black thumb a much better chance of keeping weeds at bay and the plants I actually spent money on alive (I think this is why I dislike gardening in general; it’s gambling my money on something that might not live… like buying a $15 goldfish… and yeah, I know that most places have guarantees for plants, but who wants to dig up a dead plant, put it back in your car, find the damn receipt, and drive to the store you bought it from? Ok, rant over.).
But best of all, lasagna gardening reduces the overall cost of filling each bed with pricey bags of gardening soil and instead lets me use items that my yard has already provided in abundance… like cheap newspapers that get chucked onto my front lawn, pine straw, and mulch from tree removal earlier this year. Here’s how I did it:
1. Cardboard
The base of each layered bed is a generous supply of cardboard. Just before I began building the beds, I gave away an entire recycling container worth of cut up cardboard, and then immediately kicked myself, thinking I would have to wait weeks to collect enough again to fill these three beds. And then I walked around my house for about ten minutes and realized that cardboard is about as abundant in a person’s home as that clown car of plastic-bags-inside-another-plastic-bag BS we all fall victim to. So anyway, plenty of cardboard.
The cardboard (wet newspaper works too) acts as a weed blocker, kills the grass below, and also helps prevent any roots from working their way up. While these pictures look a bit disheveled, you’ll want to fully cover any exposed grassy parts before adding the next layer (so fill in gaps with newspaper if the cardboard isn’t malleable enough to fit).
2. Mulch
For more weed-blocking power and to establish the soil in a well-drained setup, I wound up doing two layers of mulch: first with pine straw (because, well, there’s a shitload of that still around)…
And then with the mulch from grinding down the stumps of the pine trees removed earlier this year (because, well, with 5 trees removed, there’s a shitload of that too). Bonus was that since these mulch piles have just been sitting around in the heat and rain all spring, they’ve already begun to compost, which should be really nice for the beds! And people say laziness gets you nowhere. Pssh.
Some tutorials suggest adding “green” layers too, such as grass clippings or other yard debris. I haven’t added any of that to the pile, but if you have it, use it.
3. Soil
I haven’t really gotten to this step yet, because it turns out that it takes a lot of wheelbarrows of pine mulch to fill in these beds, but I’m planning on combining a few bags of compost and possibly peat moss to top things off.
There’s more filling in to do this week, but I’ve already accumulated a total of 6 plants to fill in the first two beds (I would have gotten more, but it was all the store had of what I wanted). But it also means I can only wait so long to put them in the ground, so this will be a good way to push me to get things done!
I’ll have some final shots ready once planting and mulching is all complete, but I’m glad to be feeling like I took a GIANT step forward in making this side of my yard look a bit more organized and well-maintained. It’s redistributing the large mounds of pine mulch too. And did I mention mostly FREE? Gotta love that.
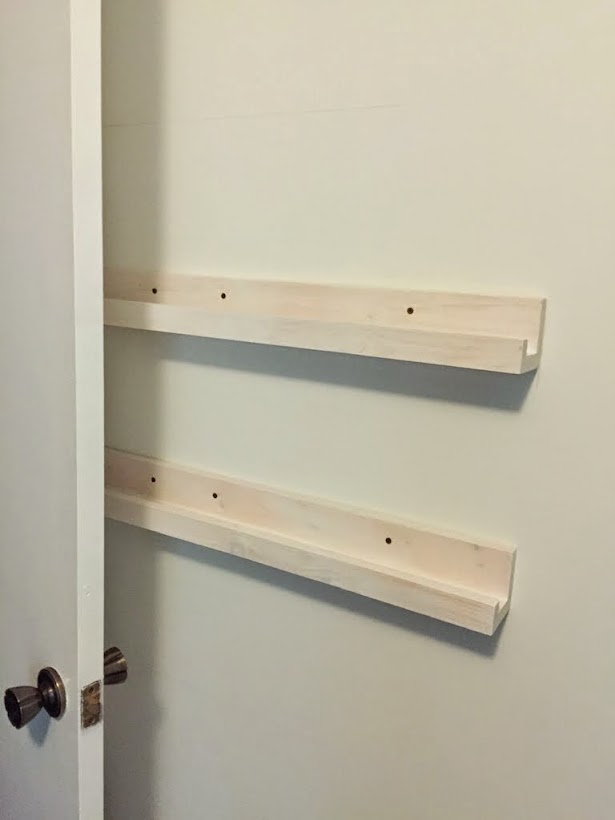
The floating shelves in the laundry room are now painted and finished! They’re everything I wanted: wide, solid, long… and not at all chunky. That last part seems to be one of the hardest-to-find elements when it comes to floating shelves, so I’ll have a tutorial ready for you on Monday with the full play-by-play and final photos (I’m waiting on the last coat of paint to cure before putting anything on top of them, & then I can take photos).
I’m excited to start loading them up and putting them to use, but there’s one very important part that I thought could use its own bit of instruction before the full how-I-built-them tutorial: installing shelves that have (at least) one part belonging to a tile wall, but without a stud (aka, using wall anchors).
The tile wall behind the washer and dryer in my laundry room did not have studs in the right spot that would allow me to secure the first cleat for the shelves to sit on.
And since these shelves were going to be long, wide, and preferably thin, I knew that getting this piece secure would be crucial to the shelf’s ability to support and distribute weight. Here are the details!
Materials needed:
5/16″ drill bit for ceramic/glass tile (determined by the size of the wall anchors and screws I was using; look at the back of the package of the wall anchors for info)
3-inch #10 drywall screws (to go through the 1.5″ width of a 1×2 on its longer side and the 1.5″ length of the wall anchor; use a shorter screw if you’re going through thinner material)
painter’s tape
spray bottle of water
paper towels
pencil
level
hammer
The important things to remember about drilling through tile are these two main points:
Slow & steady is the name of the game; be patient!
Be absolutely certain that’s where you want the hole; there isn’t any room for error!
And one more thing: it’s really not that scary! Sure, you may not want to make a mistake, but I promise you that you’re probably building it up in your head more than it will amount to be.
With all the work I put into tiling the back wall of the laundry room, the last thing I wanted to do was drill in the wrong spot or worse, crack the tile by putting too much pressure on the bit. To get started, I measured out two spots on the shelf support (a 1×2) where I’d predrilled holes and then measured the same on the wall. I used painter’s tape to mark a level line in both places for where the shelf supports would go. The painter’s tape was actually thicker than the support, so I used a level and a scrap piece of wood of the same thickness to make sure I was marking each spot correctly and lining them up to the other level lines I’d made on the wall.
Be sure your holes are LEVEL! I know I said it already… but it’s worth repeating :)
With your holes marked on the tape, you’re now ready to take the plunge and drill the first hole. Load a spray bottle with water and put a paper towel beneath your work to catch drips (if you don’t want it dripping all the way down the wall, consider taping both ends of a folded-up piece of paper towel a few inches lower to the wall… it will soak up the water as you go!). The drill bit should say on the package that it’s okay for use on tile, and specifically the kind of tile you’re drilling through (some might be okay for multiple types, but I spotted one tile bit that said not to use on ceramic, so I had to keep looking) … these are available in the hardware section of your local Blue or Orange and specially packaged/labeled separate from the usual bit sets. Also pay attention to the size of the bit… some multi-packs will include various hole sizes, but since you’re also using a wall anchor here, be sure that they all match up for the same use (for example, a 5/16″ bit was mentioned on the package of the 5/8″ wall anchor, so I knew which drill bit to buy).
Using the proper bit, begin drilling the first hole; go very slow and then pick up a little speed when the drill bit starts to gain traction in the hole created. The friction will cause the bit to get very hot and may even smoke, so use the spray bottle of water to cool things down as you go. Drill… spray… drill… spray. And so on.
The tile dust and water will create some dirty sludge that you’ll need to clean off of the bit before drilling the next hole.
When finished creating all holes, peel off the painter’s tape and clean up any remaining sludge from the wall.
The wall anchors I bought also came with its own drill bit, which I found that I did have to use even after doing all of this with the specialized bit. The hole for the anchors was just a smidge too tight, and I didn’t want to risk the anchor breaking the tile when I tapped it into the wall; luckily the second bit for the anchors etched away just a small sliver more (it did chip the edge of the hole in the tile though, so I was glad to have used the other bit first), and the anchors popped in with a few light taps of a rubber mallet.
With the anchors in place, you can now add the first shelf supports on the tile wall and continue on with the rest of the shelf installation. When screwing into the anchor, be sure to screw all the way in so that the little wings of the anchor expand (for some reason these anchors appear to have bad reviews with some retailers, but I had zero issues).
That’s enough for this post, but I’m very happy that these shelves are finally done and ready for a supporting role (ha) in the rest of the laundry room makeover. The full floating shelf DIY will be up next week!
Last week, I mentioned that I was building a number of things, including something organizational for my home office. I’ve finished 2 out of the 4 total that will be installed, but wanted to go ahead and share the modified plans with you for my wood stamp collection display!
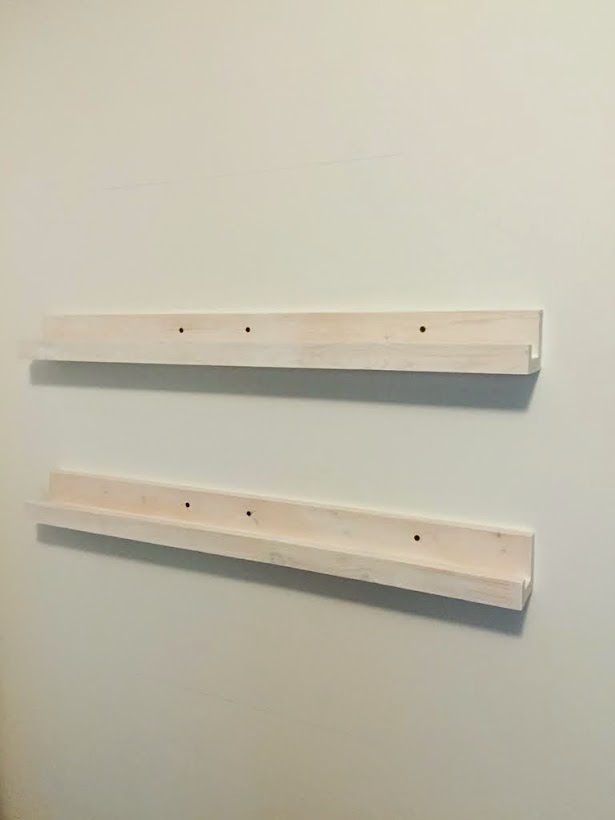
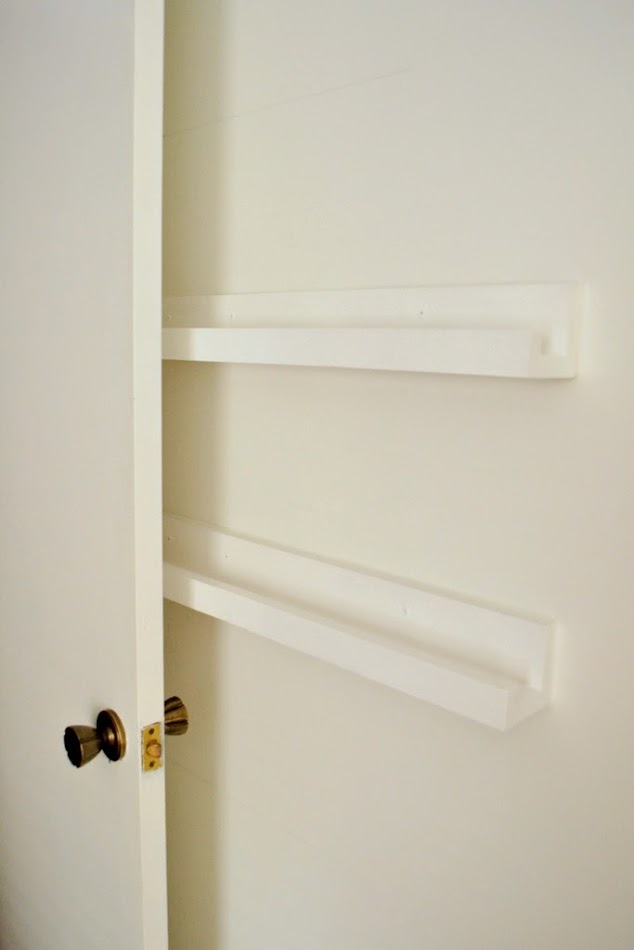
These wood stamp storage plans are heavily based on Ana White’s $10 ledges, but a 1×4 is slightly too wide to fit the narrow space behind the door. Instead, I used 1x3s for the bottom and back of each ledge, which also reduces the cost down even more to around $4-5 per ledge (since I was going to paint them, I chose pine boards that are just slightly nicer quality than furring strips; you can also make these by ripping down some MDF, which will paint nicely too).
I bought six-foot-long boards and simply cut them in half to make each ledge, then screwed them together in the garage with my Kreg Jig. With some wood glue and my nail gun, I tacked on a piece of 1×2 to the front to use as a lip to keep the stamps from sliding off (most rubber stamp displays do not use a lip, but I’ve found that that’s also how they wind up on the floor).
I primed each shelf before installing, but caulked and painted once they were along the wall.
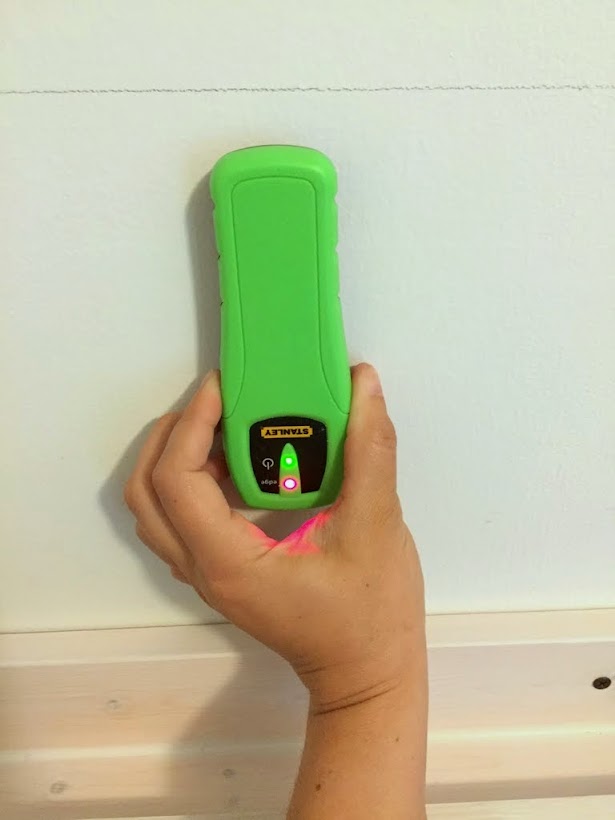
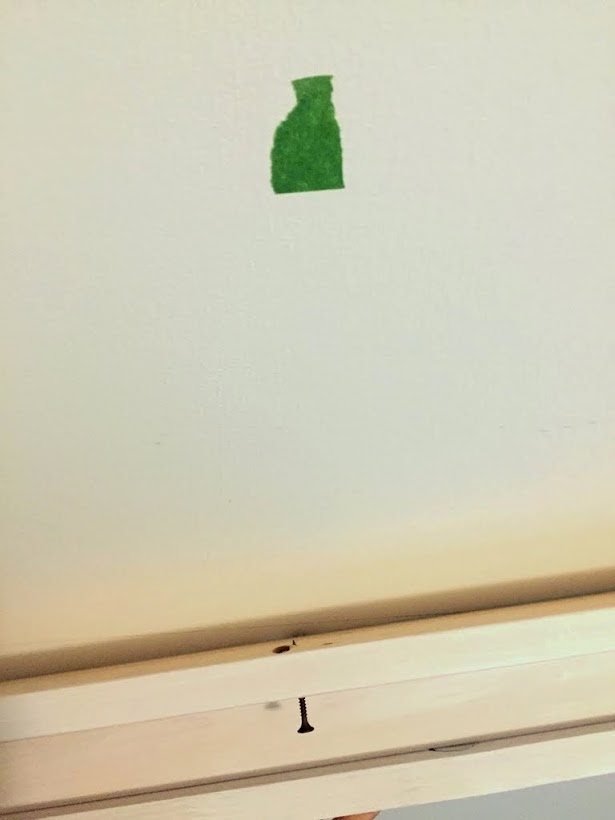
A 3-foot-long ledge can actually be somewhat cumbersome if you’re trying to install it by yourself, so I found that the easiest thing to do was to first find the studs with a stud finder and mark them with painter’s tape…
Then, screw in the first screw into the ledge just enough to allow the screw to poke through by a tiny bit on the other side, which will grab the drywall when pushing against it.
I held the ledge with one hand while using the drill in the other to secure the ledge slightly to the wall. Don’t worry if things get kind of wonky when doing this; if you leave enough wiggle room to straighten things out again, you can use your second screw to make everything level.
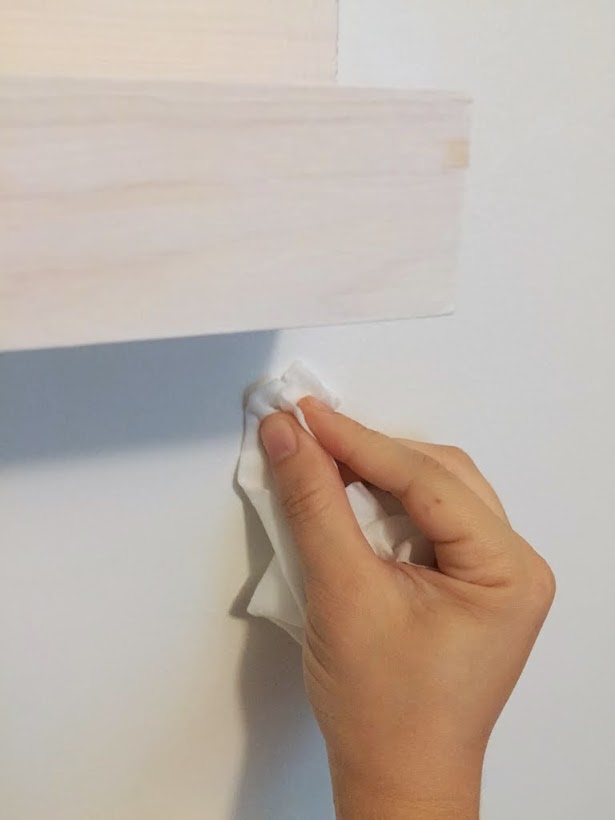
Tip: You’ll likely have a few pencil marks still visible when you’re finished, but I’ve found that an oil-free makeup wipe works as great for getting rid of stray marks as well as it does your eyeliner!
Then caulk, paint, and stock your shelves as needed.
The lip along the backside of the ledge serves as another spot for some of my smaller stamps that would otherwise hide if they were stuck behind the larger ones (and keeping the larger ones in front keeps the entire collection looking more organized).
I have a big box of rubber stamps, many of which are designed to make into wood or paper ornaments with embossing powder. Maybe with these now out of the back of my closet and onto a display shelf, I’ll actually wind up using them more (and when I do later this year, I’ll show you how to make some of those ornaments yourself).
One more piece of organization in the office = one less bit of clutter. There’s plenty more to share with you this week!