Wednesday, December 30, 2015

Favorite Projects of 2015

The last week of the year can be pretty cathartic; I get to purge the past year’s misgivings, look back at favorite projects, and start making plans for a better year to come. But, I can’t deny that I also have a tendency to dwell more on what I didn’t accomplish rather than what I did. And I was going to, until I realized that I actually set and met a lot of the goals I made for 2015. Weird.

2015 projects

First off, I’ll start with the personal stuff and a few blog goals, since they all kind of tied together.

Personal Goals

Create a separation between work and home, declutter, get outside: This year, I wanted to force myself out of the house more often as I learned to manage working from home. I also wanted to declutter the things around me, which would also help me to feel less buried by being “busy” and more free to untangle. And the result? While I’ll probably never find (and honestly don’t believe there is truly such a thing as) a true “balance” between work and home, I did a much better job of recognizing when I need a break — and here’s the important part — taking them when needed.

topsail beach

For starters, I joined a weekly running group and a weekly softball team; this got me out of the house and gave me a schedule that required accountability to others that I needed to work around, which led to better time management. In 2016, I’m planning on joining another softball program that will mix things up even more. I wouldn’t necessarily recommend forcing yourself into more activities in order to declutter your life, but this made a lot of sense to me and opened the door for a slew of new friendships, which I will admit I really needed this year. Especially since even though I did force myself out of the house for dating as well, that was far less fruitful (that felt more like a backslide, actually).

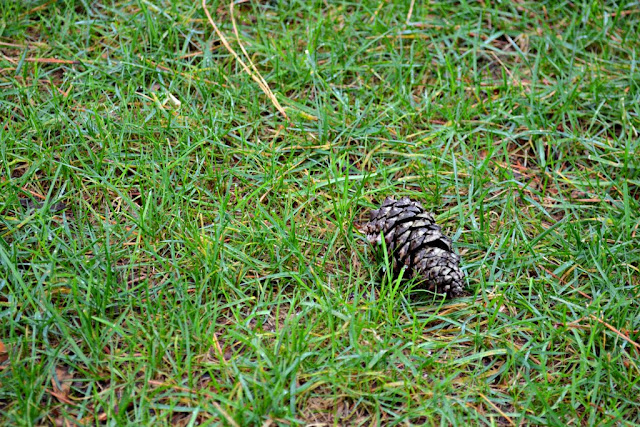
I also took a few more trips this year… and some of it was to see familiar faces (though not always human).

black feather farm chickens

As for decluttering in general, I did a lot more inventory this year: professionally, financially, socially, physically, etc. I took 300% more trips to Goodwill than I did last year. I spent more time on friends I wanted to know better and let the toxic ones go. I feel like I purged more things from the house than added to it, and while I still have plenty room for improvement (though not more stuff!), I know I did better than 2014… which means setting the same goal in 2016 is going to be worth the effort.

Blog Goals

Blog more frequently, more honestly, get creative: Okay, so I didn’t necessarily publish posts on as structured of a schedule as I first intended, but I do think that I put more effort into blogging in my own style this year, and I do feel like it paid off (for me, anyway). I really enjoyed writing certain posts, and I hope you guys enjoyed them too; I’m also glad I allowed myself to share my grief over losing a loved one. Suffice it to say that if there’s something that’s worth talking about, I will and have, and it’s led to some interesting discussions. Especially because of the comments I get from badass readers on posts where I let myself open up more (as always, you guys ROCK).

squirrels are assholes

I also pushed myself to do some creative projects. While not as frequent as I first scheduled myself to do this year, they were a lot of fun, and creativity tends to morph and inspire in different ways over time. So, more of that in 2016 for sure.

needlepoint flower

Home Goals

Alright, this is mainly a DIY blog, so let’s get to the juicy stuff.

The kitchen: I did, in fact, manage to finish the walls, get some window covering up, and complete a few other random things (even enough to actually decorate for the holidays!). There are finishing touches and a few surprises still left to go, but I told myself to make this a functional room again, and it is. I can even brew coffee in it without getting drywall dust in my cup.

kitchen progress left side

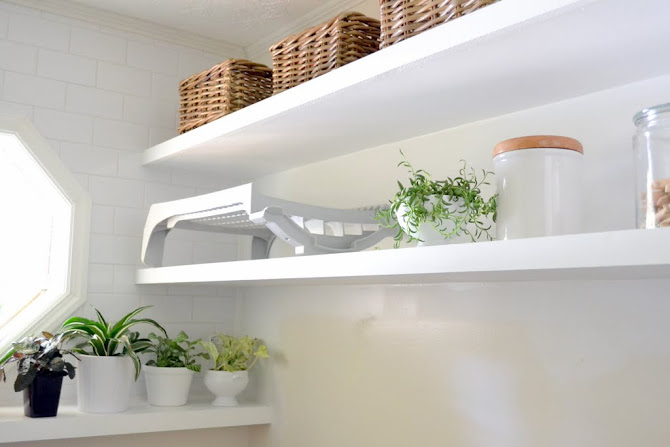
The laundry room: I added crown molding, floating shelves, plants, and started building the countertop. Not finished, but not half bad for a project that wasn’t my only priority.

laundry room shelves

favorite projects of 2015

The office: Okay, this room still has more to go too. But I did get it far more organized, added some bookshelves, added some nifty storage spaces, and will soon be sharing the new DIY light fixture!

office bookshelves

Landscaping and exterior work: out of all of my home goals in 2015, I feel that this definitely wins the Most Improved award. Not only did I take out pine trees from the front and back that helped with yard and roof maintenance year-round:

tree removal service

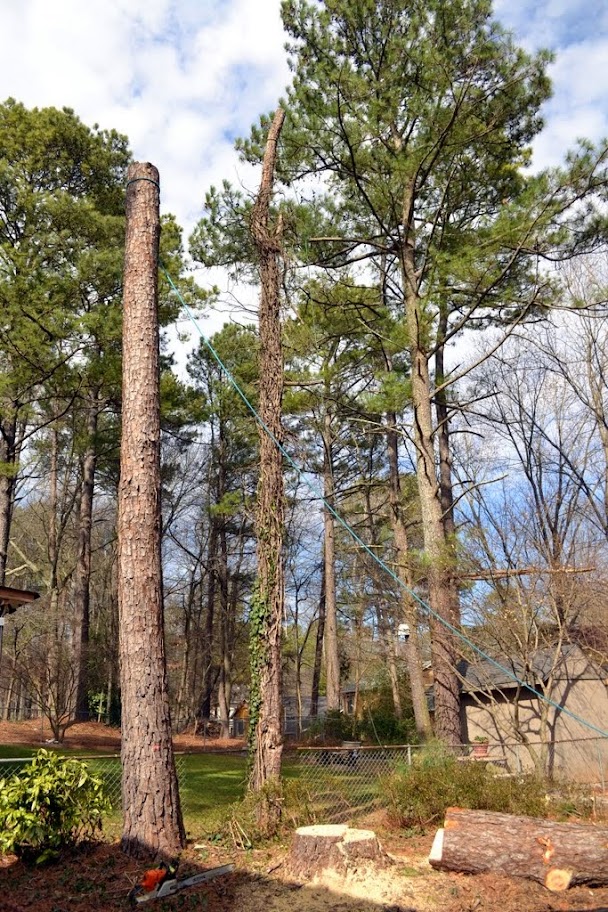
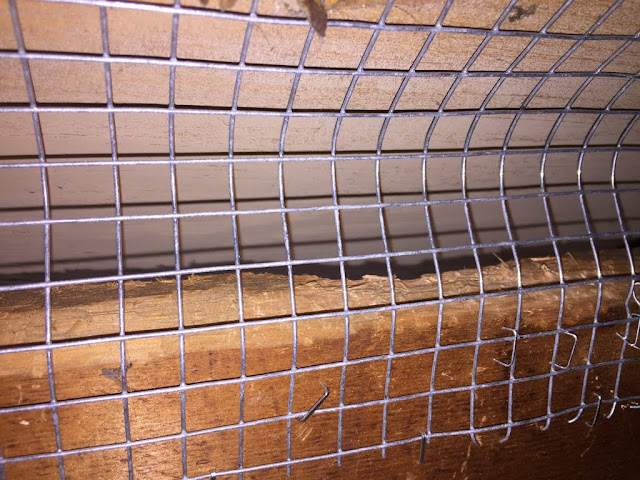
…but the repair work needed on the exterior siding was completed:

front exterior siding repair

…the front trees were trimmed back, and I found a reliable landscaping guy to take over some of the irksome jobs so that I could concentrate on other projects.

diy tree trimming basics

I also built some great DIY garden beds along the back yard fence line and improved the garden area along the side of the house.

diy raised garden beds

My landscaping guy has been helping me prepare the back yard for more improvements next year (so so excited!), so I am really looking forward to what the next 365 days will bring. More on that later.

hanging plants

Other rooms: I can’t stay in one room for too long without wanting to do another project elsewhere, so there was nothing unusual about a few other rooms that saw improvements in 2015, such as my dining room light fixture.

dining room copper light fixture

I also realized that I was going to have a much easier time with DIY projects if I had a neatly organized garage, so after cleaning it out and reorganizing, I added a lumber rack using some inexpensive materials, built in a new pegboard wall, and installed new lights that give me much more light to work in!

diy lumber rack

And not to mention, I got to actually decorate for Christmas! As in, my house was actually organized enough to decorate for the holidays without things like paint cans and step ladders in the way. Score for 2015!

christmas mantel and charlie

The post Favorite Projects of 2015 appeared first on The Ugly Duckling House.

Website // Subscribe // Advertise // Twitter // Facebook // Google+

Monday, December 28, 2015

Christmas & The Last Week of 2015

Hey there! Back from all of the Christmas dizziness and a minimum number of naps to keep me sane. Charlie got plenty of rest too, but it wasn’t until she’d completely worn out her cousins and stolen all of their toys and eaten ham from the table and pestered every family member for hugs and kisses before she finally went down HARD once all of the gifts were open.

Charlie and her cousins

Like many single women who don’t have children, my family pretty much treats Charlie and my sister’s two dogs, Lemon and Lana, as though they are fur-babies. They get gifts from my parents, they “give” gifts to each other, and they are referred to as being cousins or having an “Aunt Sarah” or “Aunt Emily.” There are plenty of people who absolutely hate the behavior of treating dogs like children, but it’s always been the norm in our family, so I just let it happen. My sister takes it a step further than I do though because her dogs have succumbed to her stubbornness to dress them up in costume whenever the mood strikes (they get a shitload of treats out of the matter, so I don’t think I’d complain that much if I were in their shoes Santa hats, either).

to charlie from lemon and lana

I also spent some time with friends doing Christmas-y things like making gingerbread cookies, but the funniest part of this holiday has definitely been the weather… 78 degrees! And grilling?!?!

gingerbread cookies

It was so hot while baking that we kept the doors and windows open, too wet from rain to spend time doing much of anything outside (except take advantage of rainy day $1 beer specials). And cars kept driving around the city missing an antler… presumably because they’d forgotten they put antlers on their car and rolled the window down.

car antlers
image source

Overall, our Christmas was pretty mellow. It’s been bittersweet without Granny, but we all still enjoyed our traditions and everyone got some great gifts.

Charlie and I Christmas 2015

I didn’t get a lot of tools this year or hug any of them like ponies as I usually do, but I did get an awesomely nerdy ornament for the tree next year:

doctor who ornament

…and some outdoor LED lights I’ve been wanting to put in the back yard for ages (which means more outdoor projects next year to give me a reason to string them up!).

outdoor led edison bulb string lights

I also got a great lighting kit to help with my interior shots when the windows prove to be difficult to shoot around, such as in my kitchen and laundry room. Speaking of…

sink closeup

I’ve already been taking a few pics as my Christmas decor comes down (though I still need time to learn how to use the new lighting kit). I love how much more polished it looks with the DIY Roman shade I made for the window this month! You can grab a few more photos on my Kitchen House Tour page (the House Tour itself is getting LOTS of updates this coming month!).

window casing

There are a lot of other cleanup projects going on, such as taking down the Christmas decor and making room for all of the window casing that will be going up in the living room in the next couple of weeks. I’ll have more for you soon in terms of recapping this year’s successes and what projects to look forward to next year, including a few more posts in the works:

  • Some of my favorite post-Christmas deals I picked up this year
  • How I’ve saved almost $900 in furnace repairs this winter
  • How to “comb” rugs and carpets (if you have pets that shed like Charlie does, you’ll want to read this!)
  • Master bathroom updates since the last installment
  • & more personal updates as well

I hope you all had a wonderful holiday. I can’t wait for 2016!

The post Christmas & The Last Week of 2015 appeared first on The Ugly Duckling House.

Website // Subscribe // Advertise // Twitter // Facebook // Google+

Friday, December 25, 2015

Charlie Butt. Oh, and Merry Christmas!

Sorry guys, I just think Charlie is kinda cute sometimes and wanted to share some photos of her since I’m taking a break from DIY today and sharing the holidays with my family. Last week when I was taking living room photos, Charlie investigated nearly everything and spent a little while sniffing at the fire. She rarely lets me snap away with her in front of the camera these days (she seems to have figured out the camera thing), so I took full advantage.

Charlie cozy fire

Speaking of Charlie, I had to go out of town recently where the doggie daycare facilities took a Christmas photo of her for their “Winter Wonderland” theme. So it was kind of sweet to get a photo of her when I left! Even if she does look a little scared and out of focus. Goofy scarf was theirs, but don’t be surprised if you see a similar one around Charlie’s neck on Instagram today as I share family pics (it may or may not have been inspired by this photo).

Charlie Merry Christmas

Merry Christmas, folks. Hope you have a wonderful holiday! Be back next week with more DIY, including some furnace repair tips that recently saved me a ton of money. Take care!

The post Charlie Butt. Oh, and Merry Christmas! appeared first on The Ugly Duckling House.

Website // Subscribe // Advertise // Twitter // Facebook // Google+

Tuesday, December 22, 2015

The Crazy Attic Squirrel Saga, Part 2

For the record, I did not intend on having any follow up to my original story about the Asshole Squirrel who keeps trying to squat in my attic. But, since she (or maybe he, if it’s her offspring?) seems to be about as stubborn as I am, there were a few things I still needed to do in order to (hopefully forever?) prevent the attic squirrel from finding a way back in.

pudgy squirrel

Who’s ready to see some dusty flash photography of an attic? You know I am.

For those who want a refresher, the gist is that I have been battling a small but irritating rodent for the last few months. It wants to be my roommate, and that sounds about as appealing to me as touring the world with Mona Lisa Saperstein.

i got bored

Anyway, every few weeks since first successfully evicting it from the attic, the squirrel has tried to access the front window area next to my bedroom. I suppose that’s pretty lucky for me, since it means I don’t have to camp out in other parts of the house to see if there’s activity anywhere else. Nope — instead, it tries to get in by gnawing on the roofline that’s directly over my head as I’m sleeping in the morning. Hooray for wake-up calls! Yay, nature!

For a while, I thought that I had done a pretty decent job of covering any access points with steel hardware cloth, but knew in the back of my mind that I had left one vulnerable spot. Basically, I’d covered about 80% of the area and left one spot unstapled (after running out of the pre-cut mesh I’d dragged into the attic space with me during the heat of summer). I knew the squirrel could come back eventually, but I also hoped that through sheer will I could prevent it from happening, since going back up there meant doing the worst yoga the world has ever seen.

attic yoga
Fitting through this space: not the most graceful activity.

Well, you can all probably guess where things wound up: the squirrel found my attic’s exhaust port* and found its way back in. Because squirrels aren’t as dumb as I want them to be.

squirrels are assholes

The squirrel had a pattern where it would leave the roof alone for several weeks before returning and trying to gnaw on the same spot. I suppose the reason why it likes this area is because of the drain spout, which works as a ladder of sorts while it concentrates on eating a hole along the top board separating the roof from the siding. Through either hubris or laziness — or both, take your pick — I chose to simply walk outside when this was happening, shout something at it (“Yeah, I SEE YOU, JAGWEED”), or throw a pine cone near the spot to let it know I wasn’t above getting into a petty fight. The squirrel would run away, and I didn’t have to go back into the attic again. I considered this a win.

mona lisa why are you still in front of me

But, after a pattern of hurriedly gnawing at the spot and being chased off (and repeat) continued, the squirrel did manage to squeeze its portly body back through the opening it had created. Once I heard the familiar scampering across the ceiling, I had to act fast. I waited for it to leave, then went back up, contorted myself back through the narrow opening, and accessed the small nook above the front window of the house. After climbing up the previous few times, it was far less creepy and I was sure I wouldn’t come face to face with more angry squirrels. Or rather, I hoped.

Since I didn’t get much of a chance during all of the previous time’s activities to take pictures, I snapped a few extra photos this time around. Below, you can see the front opening (the squirrel’s original access point) of the gable vent that I’d already covered in steel mesh.

attic original access point

Once that hole was closed off (to be repaired cosmetically from the outside next spring), it found a way to leave from the right side of this space by gnawing along the board that separates the roof from the joists.

attic hole on right side

Which on the outside just so happens to be where the storm drain curls in the below pic.

attic squirrel access point

Originally, I’d stapled the hardware cloth to the right, where I could see gnaw marks and a hole had been created (weak spots seemed to be where the roof, the horizontal board, and the rest of the attic area met). Lugging the entire roll of hardware cloth up to the attic and cutting it up there would be a nuisance, so I had only cut a few pieces that I thought would be sufficient. After running out, I hadn’t gone back up, leaving a small spot further to the left somewhat vulnerable. This is where the squirrel found its way back in, so lesson learned: take the effort to cover it all up in one go!

squirrel gnawing trim

That’s pretty much what I did this second time around. I covered the original spots where I could see gnaw marks, but it was made even easier to see these spots since the light filtered in more heavily in these areas. If you’re doing this yourself, just keep in mind that it doesn’t have to be pretty or sophisticated; as long as it won’t wiggle out of place (even if it meant stapling onto a stray scrap of wood and wedging into place), you’re good to go.

light filtering into attic

Once those were stapled with the mesh, I took extra pieces and ran them along the rest of the roof line where I could still see light. The squirrel hadn’t tried these areas yet, but it would probably be just a matter of time. As an added measure, I sprinkled some cayenne pepper along the entire board as well (I’ve read that it’s effective for keeping them out of birdseed, so I figured it couldn’t hurt!).

use hardware cloth to cover attic squirrel access points

I wish I could say that it’s entirely over yet, because the squirrel keeps making attempts but isn’t getting in again. Each time I hear the scratching noises, I run outside to let it know that I’m there and not really in the mood, throwing the occasional pine cone near the drain to chase it off.

Will this be the last few rounds with my attic squirrel? I can’t say for sure. But I have a shitload of pine cones at the ready.

pine cone

*Relevant and timely Star Wars reference! Sorry folks, I have only seen the first movies once and haven’t yet seen the new movie in theaters, so I’m well aware that I’m making a dumb joke here. No spoilers, please! I am probably going to see it with some friends this week.

The post The Crazy Attic Squirrel Saga, Part 2 appeared first on The Ugly Duckling House.

Website // Subscribe // Advertise // Twitter // Facebook // Google+

Friday, December 18, 2015

DIY Christmas Stocking Initials

This year, I’m pretty darn glad that decorating for the sake of decorating is back in my life. Case in point: my living room mantel with a few new crafts thrown in, such as the Christmas stocking initials I made in about 30 minutes. It’s not rocket science (I mean, I wouldn’t be surprised if you already figured out how to make these by looking at the picture), but I figured I could share the details in case you wanted to DIY your own for just a couple of bucks.

christmas mantel

All in all, this cost me about $2 for each one, and they definitely fall into the category I’ve called “lap crafts” in the past, because you can easily make these while watching an episode of TV (most of the time spent is waiting on things to dry, anyway).

You’ll need:

diy christmas stocking initials with hook

First, a tip about stockings: I got these on a Black Friday sale at Target, but they initially had a Santa-style belt on them (see the small sliver of black about halfway down the seam?). I clipped it off mainly because my stockings don’t have a waistline, and plain looked better to me. But these were much heftier than stockings I’ve used in the past, which kept twisting on me when I was trying to snap pictures. Dumb.

wimpy stocking

My solution: I have a lot of used tissue paper for wrapping around the ornaments when they’re in storage, so it was temporarily repurposed into filling the insides of each stocking. It’s perfectly crumpled and works great for shaping. Waste not, want not, much more aesthetically pleasing all around.

filled stocking

For each letter, I grabbed an inexpensive chipboard “C” and “S” at the craft store and painted them white. Once they dried, they each got a heavy coat of Mod Podge and a generous sprinkling of Martha Stewart “crystal fine” white glitter.

make a hook with floral wire

Next, I had to figure out how to hang them, so I raided my craft storage. I wrapped a loop of gold floral wire around the top to create a hook (the wire is flexible enough to bend with your hand).

letter hook

If you’ve looped the hook right, there will be a small gap at the top of the loop to wedge branches into, suck as a small clump of berries and glittered faux pine needles that I ripped off a decorative stem I found at the dollar store. You can also hot glue them in place, but they stayed just fine on their own like this (and it means I can reuse the items in a different way next year if I wanted to).

DIY christmas stocking initials with hook

There you have it. I took off one stocking detail to add another, but it adds more sparkle and ties in a touch more white and green to the upper area of the mantel. Done!

The post DIY Christmas Stocking Initials appeared first on The Ugly Duckling House.

Website // Subscribe // Advertise // Twitter // Facebook // Google+

Wednesday, December 16, 2015

My Christmas Living Room

Even though I’m probably going to keep messing with my Christmas living room decor until it’s time to put it all away, I think now’s as good a time as any to share the full look for this year’s tree and mantel.

christmas living room and charlie

The last time I even decorated to this degree was back in 2011 when I was just starting to figure out what I wanted the living room to look like. Since then, probably the biggest change has been realizing that the walls were painted too dark for the limited lighting I get in the room, which prompted me to go with a much lighter color in the hallways, entryway, and upstairs landing area as well.

2011 holiday mantel

A lot of the decor was reused from past years, but there have been a couple new additions, especially to the tree’s red/white/silver/gold color scheme (sources: family heirlooms, my Old World Christmas collection, Target, TJMaxx, Homegoods, At Home, Hobby Lobby). I had some trouble figuring out a decent way to clip my old star onto the new tree, so I went with a few ribbons up top that I found at the dollar store.

living room christmas tree

I don’t love the top, but the rest of the tree grabs my attention so much that I don’t mind. I added my two living room chairs on either side with some pillows from Target as a way to keep Charlie from sneaking behind the tree and bumping my ornaments (two beauties already lost :( …).

ornament closeup

finished christmas tree

As for the mantel, most of it has been taken over by my big-ass TV, but I still found some room (read: crammed decor around it like there was no tomorrow) for the items I liked best (clearly, I have an undying love for mercury glass).

christmas mantel left

I snagged a new bronze reindeer (which, including the kitchen’s red one, brings my total up to 3) and a lovely metal rocking horse that I keep moving around because I like it so much. I may keep that little guy around all year!

christmas rocking horse

The basket next to the mantel is also new, filled with several pillows I’ve either bought new this year (from At Home) or had upstairs in my master bedroom. One of my pet peeves is seeing hazards around mantels as decor (because fire), but I went with it anyway when I snapped these pics (I immediately took them and the sheepskin rug away and pushed the poinsettias back to the edges of the mantel after I was done).

christmas mantel lower right

A word about the poinsettias: I normally fill a cart with red ones on Black Friday (both Lowe’s and Home Depot have them for 99 cents apiece that day each year), but I have never bought the red-and-white-pinkish ones until now. I guess I went with it just to see if I liked the variety. The red ones began dying off quickly, so I think next year I’ll just buy more of these. (The platform the taller one is resting on is actually one of my wooden couch sleeves I made a few years ago.)

bronze reindeer

I’ve got two stockings hung (“with care” is debatable) with initials (one for me, one for Charlie). More on that in a future post on that little craft and such.

christmas stocking

I also switched out the rug after the old beige and blue one clashed too much for my liking; I snapped this pic mid-switch so you can laugh with me (or, well, at me) at how sometimes I turn easy stuff into a comedy of errors. Every time I moved the rug, the rug pad wanted to come with it, which at one point was put into a flustered heap in front of the tree. It all worked out eventually, of course, but it’s funny to me when a simple thing refuses to cooperate.

crumpled rug

The old rug is swapped it out for the one I originally had in my office and topped with a Turkish rug that my sister gave me, which I liked because it adds some extra, unexpected pattern. The bottom rug is clearly too small for the room, but at least now I know what I might be looking for in a replacement (and depending on what I find, I might still try to layer the Turkish rug on top). I didn’t realize before this that Turkish rugs have to be brushed a certain way to look right (you can see that from certain angles it looks like it’s got one light side and one dark), which I’ll have a post about sometime soon with the details.

christmas mantel and fire

I’m really glad I chose to decorate this year because it reminded me of all of the plans I still have for the living room. Some of it is relatively simple, such as bringing out the color of the stone with some sealer and touching up the wooden mantel area (it has seen better days for sure). You might have noticed that the coffee table is currently missing from the room, and that’s because I’ve put it and the old side tables on Craigslist and dragged them out to the garage. The plan with those is to build my own and give myself a customized option with storage (when I sketch things up, I’ll share it). If you have your own suggestions, I’m all ears as I gather ideas!

charlie at christmas
Speaking of ears

The windows will also be getting an upgrade soon with some window casing (and then hopefully actual window treatments). I’ve added it already to the dining room and kitchen, so completing these three (and the one by the front door) will finish off the entire first floor. I’m tempted to start on it even as I sit here typing this, but I have also been telling myself to wait a few weeks, since it will be a hell of a lot easier to do when I take down the tree and have full access to the area. Whether or not I actually take my own advice is another story. I’ll also be adding crown just like I’m doing in the kitchen, so I’ll share that progress as it comes as well.

christmas mantel and fire

Finally, I’m hoping to start on the built-ins (!!!) I’ve had in mind for years once the holidays are over. I can’t wait to start sharing that project!

Christmas living room

So, um… there’s my Christmas living room? I intended on just sharing the decor, then suddenly this post turned into talking about all the things I want to change up. Ha! Hope you’re having a good week!

The post My Christmas Living Room appeared first on The Ugly Duckling House.

Website // Subscribe // Advertise // Twitter // Facebook // Google+