Wednesday, November 18, 2015

An Easy Gift for Any Occasion: DIY Candy Bouquet

FacebookTwitterPinterestTumblrEmail

This past weekend, some of you might have seen some beach posts on my Instagram

Topsail Beach 2015

To catch you up, I took a brief trip to Topsail, North Carolina to spend some time with a few favorite DIY pals. It’s kind of weird; considering that we have so much in common and feel like we know each other well, we have very few interactions in person except for an annual conference or two. To change that, Brittany (Pretty Handy Girl) suggested we all join up at an island condo and just have fun. It was off-season, but the beach sounded perfect. No projects, no demands, just relaxing with friends. Despite my lonely 7-hour drive to get to there, it was a great recharger. I took mostly embarrassing photos that Brittany, Sandra (Sawdust Girl), Karah (The Space Between) and Leen (Leen the Graphics Queen) have already forbidden me from posting, so I’ll just refer you to a video that Brittany took of us freezing our asses off in the ocean instead. We had a great time that wasn’t at all blogworthy, spent a ridiculous amount of time on our computers (can’t pry bloggers away, I guess), and drank way too much coffee, beer, and wine. It makes me really, really want to consider a beach condo makeover as a future DIY project. Anyone know of some inexpensive real estate?

Like, oceanfront for $5? A girl can dream.

Anyway, I’m back at my completely beach-less house and working on a few things, so more on that soon. In the meantime, I thought I’d share a quick project we whipped up as a thank-you to the owner of the condo for letting us stay (Brittany’s aunt, who is also a famous author and had Brittany do the condo’s makeover a while back, was going to be visiting the same condo not long after we left).

bouquet

In the simplest of terms, it’s a potted flower plus sugar coma that’s propped to look like it’s exploding out of the plant. It’s barely enough work to even call it a project at all, but I’m 99% sure I’ll be using this as a go-to present idea at future get-togethers, so why not pass it along?

bouquet closeup

We got the idea while out shopping, but the store versions were $15-20 or more for candy no one would really want to eat, so we decided to DIY something with the name brand stuff that Brittany thought she’d like more. Even better: you can get all of these items at the grocery store, so it makes an easy last-minute present when you’re already on your way and realize you forgot that thing you wrapped back at home.

All you need are:

  • an inexpensive indoor potted plant (next to the flower bouquets at most grocery stores)
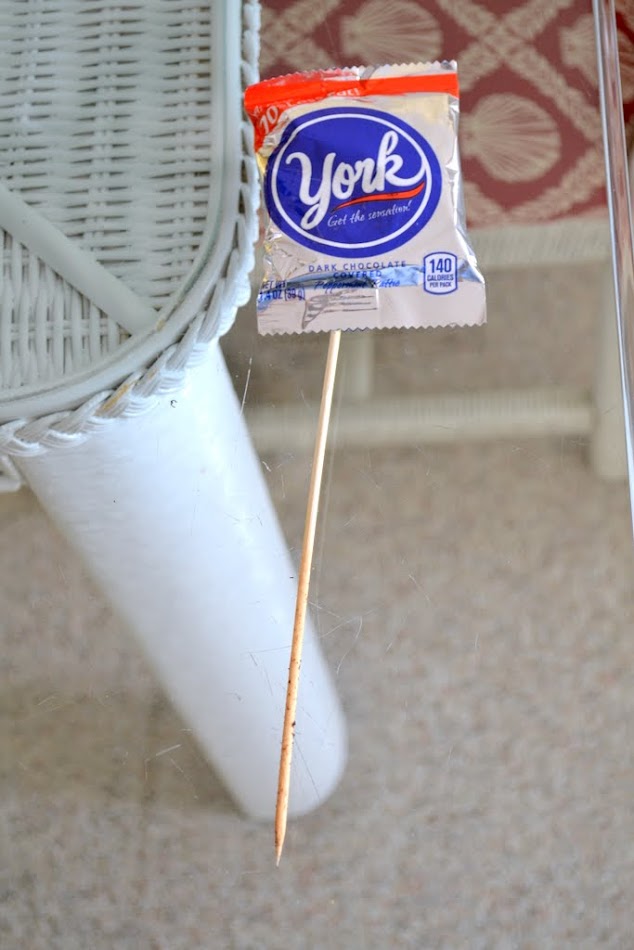
  • wooden bamboo skewers (the kind you use on the grill)
  • candy large enough to hide the skewers from the front (from checkout or the candy aisle)
  • duct tape (or if you have more time, maybe hot glue)

The assembly is pretty straightforward. All you need to do is tape the end of the skewer to the back of each piece, then skewer the end into the dirt.

The plant should hold the candy upright on its own, but water the plant (to get the dirt less likely to crumble) and tape the candy lower down on the skewer if you’re having top-heavy issues.

The back won’t be pretty, but people probably won’t care. Free chocolate is free chocolate.

Feel free to dress it up as festive as you like (in our case, the pot already came with the foil dressing). As I thought more about it, I realized you can do plenty of versions of this for whatever holiday or event is coming up, such as a housewarming or family get-together. Candy canes in a poinsettia or amaryllis, turkey lollipops in a pumpkin and mums, chocolate hearts in some roses, etc. Though I’m pretty sure a bouquet of Twix and Snickers is always appropriate… just sayin’.

diy candy bouquet ideas

Is anyone else, besides me, craving a Snickers now? Sorry about that!

diy candy bouquet

FacebookTwitterPinterestTumblrEmail

The post An Easy Gift for Any Occasion: DIY Candy Bouquet appeared first on The Ugly Duckling House.

Website // Subscribe // Advertise // Twitter // Facebook // Google+

Sunday, November 15, 2015

Breakfast Area Lighting Options (& Mini Mood Board)

FacebookTwitterPinterestTumblrEmail

So, about that light in the kitchen:

After spending part of my afternoon to install it, I have decided I’m not a fan.

When I first bought it (a year ago?), I thought it was a good choice. It was inexpensive and perfectly “fine” for a light fixture that was going to replace a gumball light that no one wanted anyway. But as anyone who has been redecorating a home knows, sometimes tastes evolve as the project moves forward. It also took some unexpected effort to install this thing, so I really really wanted to try to like it; I even considered DIYing a hack to get it more like what I think I want now. But eventually, had to admit defeat. It’s just not the right choice for the room.

So now, I’m stuck with a light I can’t return and wanting to find something new. But what?

lighting options - breakfast nook

Fortunately, there are a lot of amazing options in my less-than-$250 price range.

Unfortunately, there are a lot of amazing options in my less-than-$250 price range. So many, in fact, that I rigged this nifty little scroll-y thing below for you to browse through my top choices if you wanna do some online shopping with me (contains affiliates). It’s kind of a neat change of pace from the match-the-number-to-the-link routine.

Lighting Options

However… I don’t want to make the mistake of choosing the wrong one again, so I also whipped up a mood board to help put all of the elements of the area together and visualize it. I bought the stools a long time ago and mentioned the paint color back in this post, so the rest of the to-do list mostly consists of putting up the crown, finishing the baseboard paint, installing a bar to match the kitchen countertops, and finding a simple rug or runner for the floor.

breakfast nook mini mood board

My favorite light fixture is the one in the pic above, but it looks like it’s already sold out. I’m thinking of a DIY option instead, but if it proves too much of a challenge, one of these other choices could be fun too.

Speaking of DIY challenges, Sandra from Sawdust Girl is going to be hosting a “sCrap Wood Challenge” on Nov. 20th that I plan to participate in. If you want to play along, raid your scrap wood pile and create something (no new wood pieces, check the link for more details) and be ready to link up your post (or if you don’t have a blog, just use the #sCrapWoodChallenge hashtag on social media). There’s no prize for this as far as I know, but it’s really fun to look at things people can come up with. I have a plan for what I want to do and what I plan to do if the thing I want to do takes too long to finish before Friday, so just think of this as a way to force yourself to get rid of all of that stuff you’re hoarding in your garage. Have a great week!

FacebookTwitterPinterestTumblrEmail

The post Breakfast Area Lighting Options (& Mini Mood Board) appeared first on The Ugly Duckling House.

Website // Subscribe // Advertise // Twitter // Facebook // Google+

Friday, November 13, 2015

Kitchen Wall Paint is Done!

FacebookTwitterPinterestTumblrEmail

Honestly, it’s almost kind of weird to have the pantry door back on.

But it’s a nice way to remind myself that the kitchen walls are DONE. Wallpaper removed. Walls skim coated and sanded. Primed. Bubbles removed. And Painted.

Which used to look a lot more like this:

2010
2010

Not half bad, right? Sure, there’s still more to do… as always. Like window treatments, crown, adding molding to the tops of the cabinets, cabinet hardware, and decorating for Christmas. But after spending a couple weeks snarling at my walls for being so persnickety, they are smooth (!), and I feel pretty satisfied with the results.

For those wondering, the paint color is called Cold Steel by Olympic (mixed at 50% tint to make it lighter). I knew that you could ask for tint percentages at the pricier specialty paint stores, but was really pleased when Lowes and Home Depot said I could do the same (the more you know, right?)!

I first picked out the color back when I was looking for one in the dining room as part of a partnership with Olympic paint. My buds, Jacque & Matt from the DIY Village, used the same (100% tint) color in her bathroom, but there’s enough blue/green in the paint that it looks a bit different depending the light in the room. I wound up going with Olympic again (not just the color, but the paint) because they impressed me with the finish; that may seem like an insignificant detail, but here’s why I’m rambling about this:

In terms of painting over a fresh skim coat or a patch job on normal drywall, there’s a thing commonly called flashing. This is basically the term used for a lack uniformity on the sheen because some of (thicker spots?) the joint compound will absorb the sheen and appear dull. I’ve been using a Glidden primer, then paint to resolve this, but since I knew I’d be doing two coats anyway, I gambled with seeing how much flashing would happen with the first coat. To my surprise, while there was some flashing, the second coat covered it and a lot nicer than I usually expect of any paint and appeared perfectly uniform without additional primer. I do realize that most people are never supposed to care this much about paint, but part of this blog has often been about testing products for curiosity’s sake, and I was experimenting because some brands, like Behr’s Marquee line, claim to cover things like this in one coat, so I thought I’d figure out if it was true. I was disappointed with the quality of those claims. (You’re welcome for answering a question you never asked, ha!)

Now, it’s just a matter of getting all the finishing touches finished.

It also involved putting in a new light fixture, but here’s the thing: I bought it a long time ago assuming I’d get this project done a long time ago (because things only seem to take this long for me), and I’m not thrilled about the light anymore.

I considered taking the bottom (silver) part off as a way to fix the main thing I disliked, but I’m now considering a whole different look (damn you, internets, for making window shopping so easy). More to share on that search and some more plans coming to the kitchen soon!

FacebookTwitterPinterestTumblrEmail

The post Kitchen Wall Paint is Done! appeared first on The Ugly Duckling House.

Website // Subscribe // Advertise // Twitter // Facebook // Google+